

The Base Tone Method is a RAW workflow for landscape and nature photographers. It intentionally preserves buffer zones at both ends of your histogram — called tonal gaps — so you control where the brightest and darkest points land, rather than letting a slider algorithm decide for you.
Creating Contrast is Important – But, You Need to Protect Either End of the Histogram
Every photographer learns it early: set your white point, set your black point, stretch the data across the histogram. It looks right on screen. The contrast snaps in. The image has presence. What nobody tells you is that you just handed your creative decisions to a slider algorithm — and the algorithm has no idea what your image is supposed to feel like.
It looks good in the moment. It is a trap.
The problem is not the sliders themselves. It is the timing. Pinning your data to the histogram’s extremes early in the edit destroys the file’s elasticity before you have made a single creative decision.
You lose the ability to choose — deliberately — where your image’s brightest light and deepest shadow actually live. That choice gets made by default, by an algorithm that knows nothing about your scene, your light, or what you wanted the image to feel like.
The Base Tone Method is a structured workflow that preserves room in the highlights and shadows for more creative decisions all the way to the finish.
The philosophy behind the Base Tone Method is called the Gap Theory: intentionally preserve buffer zones at both extremes of your histogram before you touch a single creative slider. Those gaps are not empty space — they are unallocated room that you fill with precision, using targeted dodge and burn, luminosity masking, and zonal contrast to lead the viewer’s eye through the frame with intention.
This is a proactive, scene-referred approach. It prioritizes the structural health of your RAW data so your creative vision — not a software algorithm — determines the final emphasis of the work.
The workflow is designed specifically for landscape and nature photography, where preserving subtle texture in a bright sky or deep forest shadow is the difference between a finished image and a processed-looking one. Every image is different, and you should adjust the method to fit your scene.
The inspiration for this workflow came from David Kingham’s Rethink Landscape Tool. The Base Tone Method manipulates the Blacks, Shadow, and Highlight sliders less than than Rethink. My addition is the Provisional White Boundary — a Point Curve ceiling that protects textured highlights structurally rather than reactively.
That distinction is a game changer in high contrast and bright images.
- Creating Contrast is Important – But, You Need to Protect Either End of the Histogram
- Before You Start — Key Concepts
- Guardrails — Read Before Step 1
- Phase One: Opening the Canvas
- Phase Two: Artistic Sculpting
- The Gap Theory — What This Workflow Is Actually Doing
- The Creative Cost of an Early Decision
- A Word on Comparative Evidence
- FAQ
- References
Before You Start — Key Concepts
Four terms come up repeatedly in the steps that follow. Knowing them now keeps the workflow moving.
Guardrails — Read Before Step 1
Specular vs. Textured Highlights: Clipping a small, non-textured specular reflection — a flash off water, a glint off metal — is acceptable. Letting those pinpoint reflections dictate your entire highlight workflow is not. Be aware that sculpting highlight contrast around clipped speculars can produce haloing or unnatural transitions. If that happens, address those specific highlights with a local mask.
SNR Debt: The Exposure slider is a linear multiplier — it scales every pixel in the image equally. Pulling it down drags your midtones and shadows toward the noise floor along with your highlights. That cost shows up later as grit when you re-inject contrast. The Point Curve ceiling in Step 4 avoids this problem because the stopper node anchors the midtones — only the tones above that node are remapped. Your shadows and midtones stay where they are. You are compressing the ceiling, not lowering the floor.
The Curve Threshold: If you find yourself needing large Basic panel moves after the curve step, you moved to the curve too early.
Blacks as a Boundary Tool: The Blacks slider establishes your tonal floor. Raising the Blacks slider opens up the shadows creating more tones and provides room to darken areas that you choose without crushing the Blacks.
A Note on Time
Eleven steps looks like a lot on paper. In practice, once the workflow becomes familiar, the entire Base Tone Method takes less than five minutes to complete. The steps are sequential and build on each other — there is no backtracking, no second-guessing, and no starting over. Most of the time is spent reading your histogram at Steps 3 and 4. Everything after that moves quickly.
The first few times through will take longer as you build the muscle memory. By the tenth image, the sequence will feel natural. By the twentieth, you won’t be counting steps at all.
Phase One: Opening the Canvas
“Step Zero” — Technical Purification
Before any tonal mapping begins, remove sensor-level and lens-level defects from the RAW data. These are not creative decisions. Address them first so they don’t contaminate every subsequent adjustment.
Denoising and demosaicing: DxO PureRAW is the preferred pre-processor. DxO claims its DeepPRIME engine performs denoising and demosaicing simultaneously — according to DxO’s internal testing, this integrated approach preserves edge integrity more effectively than downstream noise reduction applied after demosaicing is complete. No independent third-party testing has confirmed or contradicted this specific claim as of publication.
But as you will see in the videos below, you can raise the black slider 100% to the right and no noise shows in images processed with DxO Pure RAW.
Adobe’s AI Denoise is a valid alternative, though it operates after demosaicing and cannot provide the structural advantage of removing noise from the colors in deep shadowed areas.
When DxO denoises during demosaicing, the noise is removed from the raw signal before color information is interpolated into each pixel. The result is a structurally cleaner file — the pixel values in the shadows and midtones represent actual scene data rather than a mix of signal and noise baked together during color reconstruction.
When Lightroom denoises after demosaicing, the noise has already been partially locked into the color and luminance structure of the pixels. It has less noise than the original file, but some noise is still woven into the file. When you subsequently lift the Blacks or Shadows slider, you are scaling those pixel values upward — and the noise embedded in them scales up with the signal. In high-contrast shadow regions especially, that is when you see it: luminance grain, color speckle, or loss of fine edge definition in the areas you are trying to open up.
Demosaicing is confusing and not logical to our brains. Here is an article that explains Demosaicing including links to other articles on how cameras and software turns once color into three and then into an image.
Optical corrections: Remove Chromatic Aberrations and apply lens-specific distortion corrections. DxO’s Optics Modules address field softness and corner sharpening with camera-and-lens-specific precision that generic Adobe profiles cannot match.
Note A: — If you consider yourself a purist and object to AI-based corrections, I’d suggest reading some of my other articles on how RAW files are actually constructed. Every RAW file is already modified by your camera’s hardware and the demosaicing software that interprets the sensor data. That’s no different in principle from the chemistry involved in developing film — or from any Lightroom profile you assign to the image.
Note B — On DxO PureRAW: If you shoot with a high-quality lens on a top-of-the-line camera body, DxO PureRAW’s benefit narrows. The tool’s biggest advantage shows up when improving image quality from a less-than-stellar lens. That said, DxO does offer more granular denoising control than Lightroom’s AI Denoise, regardless of lens quality. The simultaneous denoising and demosaicing is the biggest structural advantage — particularly for high-contrast scenes where shadow regions dominate the left side of the histogram.
Step 1 — Establish the Technical Foundation: The Profile
Select a profile. Which profile depends on how you processed the file.
If you are working from a native RAW file: Select a camera-specific Linear Profile. This removes the baked-in S-curve of standard profiles, reclaims up to two stops of usable dynamic range, and gives you the blank canvas the Gap Theory requires.
Tony Kuyper offers free camera-specific Linear Profiles for most major camera models at goodlight.us — installation instructions are included and the process takes about two minutes.
Understanding why linear profiles give you maximum editing control is the foundation this method builds on (If linear profiles are new to you, that article explains the concept from the ground up before you continue here). The Base Tone Method exists because that foundation needs a structured workflow on top of it.
If you used DxO PureRAW: Your file is already linear — DxO completed that work before Lightroom opened the file. Based on widely reported behavior when stacking a Linear Profile on top of a DxO-processed DNG, Adobe Standard or Adobe Raw Neutral are the safer starting points. I have run a camera-specific Linear Profile on DxO-processed files without visible problems, but the risk is real enough to disclose. Read how DxO PureRAW changes which profile to use before deciding. (That article also includes a stress test you can run on your own files to check for hidden highlight damage.)
Step 2 — Chromatic Calibration: White Balance
Correct the Temperature and Tint before you touch anything else. Color temperature directly influences how luminosity distributes across your RGB channels, and tone must always follow white balance. Neutralize environmental casts now, and your tonal transitions will stay clean through every subsequent step.
Note C: Some localized color casts — blue in waterfalls, magenta in skies — resist global correction in Lightroom or ACR. You can attempt to address them with masking at this stage, or balance the majority of the image globally and leave the heavy lifting to Selective Color in Photoshop.
You can also mask the sky, waterfall, etc., and adjust the white separately. The color balance in Lightroom’s masking panels isn’t as straightforward as the basic panel, so I leave the localized color cast corrections for Photoshop, which has better tools for the job.
Step 3 — Unpin the Tonal Floor: Blacks
Lift the Blacks slider to free shadow data that is pinned against the left edge of the histogram. This creates your first tonal gap — but only if one is needed.
Check the left side of your histogram first. If shadow data already sits away from the left wall with visible space between it and the edge, the file may need little or no Blacks adjustment. The goal is left-side headspace for your shadow dodge and burn work later, not a prescribed slider value.
If shadow data is pinned against the left edge, lift the Blacks slider with this in mind:
| Scenario | Range | Notes |
| Denoised files — all scene types | +10 to +35 | Works consistently across camera systems. Shadows open without going muddy or milky-gray. |
| Files processed through DxO PureRAW | +60 to +90 | DxO’s simultaneous denoising and demosaicing produces a structurally cleaner shadow signal, giving the slider more room before quality degrades. |
| High-contrast or night scenes | +60 to +90 | Only where the histogram is heavily left-piled and highlights were intentionally protected at capture. |
Regardless of which range applies, use the same test: if lifting the Blacks causes shadows to go muddy or milky-gray, you have gone too far. Pull back to the point where the shadows look clean and open, not washed out.
That is your ceiling (or basement in reality) for this step, whatever the number turns out to be. The slider value is a guide — what you see in the image is the authority.
Here is a video showing the process of unpinning the Tonal Floor.
Step 4 — Establish the Provisional White Boundary: Point Curve
This step is the structural core of the Base Tone Method, and it is what separates this workflow from a standard Lightroom edit. Instead of pulling the global Exposure or highlight sliders down to create highlight headroom — which incurs SNR Debt — you use the Point Curve to define a structural ceiling for the file.
Before touching the curve, check your histogram. If your brightest textured highlights already sit with clear space between them and the 255 right wall, your file may need little or no Provisional White Boundary adjustment. The goal is headspace — not a specific number. If the headspace is already there, preserve it and move on.
If the highlights, including the green or red channel data, are pressed against the right edge, proceed:
Place a stopper node:
In the Point Curve, click to place a node at approximately the 75% position. Your Input and Output values should read in the range of 191–194.
The rationale for this position is practical rather than mathematical. Everything above Input 191–194 on the curve represents your whitest whites and brightest highlights — the tonal region the ceiling adjustment is specifically designed to control.
The stopper node anchors that boundary, preventing the ceiling move from pulling the midtones down along with the highlights. The 191–194 value is not derived from a fixed formula. It is a position that has worked consistently across the files tested for this method.
If your scene has an unusual tonal distribution, move the node slightly left or right until it sits at the natural boundary between your upper midtones and your brightest tones — watch the curve shape and the image simultaneously as you adjust.
Set the ceiling node:
Select the top-right anchor point — the white point — and drag it vertically downward until the Input reads 255 and the Output reads somewhere below the original white point (225 – 250).
How far you lower it depends on three things: how much headspace your histogram already has, your sensor’s characteristics, and how much latitude you want for highlight contrast work downstream.
Here is a video showing how to establish the Provisional White Boundary.
TESTING EVIDENCE — FIVE CAMERA SYSTEMS
Working across more than 100 image files and five different camera systems — a Fujifilm X-S10 with an 18–80mm kit lens, a Nikon Z7II with an 18–300mm zoom, a Nikon Z6III with an 18–35mm wide-angle, a Sony A7V with a 70–200mm f/4, and an OM System OM-5 Mark II with a 60mm macro lens — the Provisional White Boundary behaved consistently across sensor sizes ranging from Micro Four Thirds to full-frame. ISO values across all testing ran from base ISO through ISO 1200.
The pattern that emerged was consistent: high-contrast files needed a more aggressive ceiling adjustment to create meaningful highlight headspace, while well-exposed files with natural histogram breathing room needed little or no Provisional White Boundary adjustment at all. In some well-exposed files, the white point node required no movement.
The Nikon Z7II result is worth noting specifically. With 45 megapixels and one of the widest dynamic ranges of any camera in its class, you might expect a high-quality full-frame sensor to arrive with sufficient natural headspace on its own. It did not on high-contrast scenes. The Provisional White Boundary adjustment was still necessary to protect textured highlights from the 255 wall, which suggests the method’s value is not a function of sensor quality — it is a function of scene luminance.
The OM System OM-5 Mark II result is the most demanding edge case in this testing. Micro Four Thirds carries the narrowest dynamic range of any sensor size tested here, and close-up macro files in dark conditions place the greatest pressure on both ends of the histogram simultaneously. The method held on those files. Highlight headspace was created and preserved through the workflow, and the dark close-up files responded to the Blacks adjustment in Step 3 without introducing visible noise at ISO values up to 1200.
On my Fujifilm X-S10 files, setting the Output between 235 and 240 consistently preserved highlight headspace for adding contrast and targeted dodging. Whether 235–240 is the right target for your files depends on your sensor, your scene luminance, and what you plan to do with the highlights downstream. Treat it as a tested starting point, not a fixed rule.
Step 5 — Adaptive Detail Recovery and Gap Refinement
If your brightest textured highlights still feel compressed or lack separation after Step 4, use the Highlights slider in the Basic panel to recover detail and open up those tones.
Once the textures are visible and separated, use the Point Curve’s top node — the ceiling you set in Step 4 — to manage the physical size of the gap.
For a deeper understanding of why the Parametric Curve gives you more precise tonal control than sliders — covered in detail in the linked article — the reasoning behind this step becomes clearer.
The Highlights slider is image-adaptive — it targets bright signal specifically, without dragging midtones toward the noise floor the way a global Exposure reduction does. Always favor the Highlights slider over pulling the Exposure slider down. That is the SNR Debt you are avoiding.
With the canvas prepared, the structural work is complete. Everything that follows is intentional.
Phase Two: Artistic Sculpting
Step 6 — Parametric Curve Split Point Optimization
The Parametric Curve creates smooth, continuous transitions between tonal zones in a way that Basic panel sliders cannot replicate. For a detailed walkthrough on how to operate this tool, see the complete guide to the Lightroom Tone Curve ( — recommended reading before attempting Steps 6 and 7 if the Parametric Curve is unfamiliar). Move the three region dividers at the bottom of the curve to align with how light actually distributes in your specific scene:
- Lights divider: Place near your brightest textured tones
- Midtones divider: Align with the upper midtones where form and volume live
- Darks divider: Align with the start of your deep shadows
You can also use the Point Curve here if you are more comfortable with it. My preference is to hold the Point Curve back and use it later, more like a luminosity mask, once the Base Tone is set and I am working on local contrast relationships.
The video below discusses Step 5 and 6 and how to use the Parametric Curve which is Step 7.
Step 7 — Sculpting with Parametric Sliders
Fill the tonal gaps with intention. The Parametric Curve gives you four sliders — Highlights, Lights, Darks, and Shadows — and this is where the gaps you built in Phase One pay off.
Start in the middle: Move the Lights and Darks sliders first, in small increments of 10–20 points, until the image has a balanced midtone structure.
Work the extremes: Adjust Highlights and Shadows until the image is clean — no muddy midtones, no crushed darks, no clipped highlights.
Non-hierarchical logic: The sliders do not need to follow a fixed hierarchy. The Darks slider can sit lower than the Shadows slider, and the Lights slider can extend further than the Highlights slider, if your scene calls for it.
Midpoint refinement: Once the image feels balanced, move the Midtones divider back and forth to fine-tune overall brightness. Keep an eye on both ends of the histogram — protect the gaps for your local dodging and burning later.
Step 8 — Optional Exposure Re-Anchor
If the global tonal balance shifted during sculpting, make a final micro-adjustment to the Exposure slider now. This is the one moment in the workflow where a small Exposure move is appropriate. If the correction needed exceeds 0.5 stops, your ceiling in Step 4 was set too low.
Step 9 — Basic Panel Feel Adjustments
At this stage, the Basic panel sliders serve one purpose: micro-refinements of feel, not structure. The structure is already built.
- Highlights: Keep within ±0–20
- Shadows: Keep within ±0–20
- Whites and Blacks: Rarely touched here — the tonal floor was set in Step 3 and the ceiling in Steps 4–5
A note on the Whites slider specifically: in my experience, it pushes or pulls the data too broadly. The auto-clutching built into its algorithm tends to pile up highlight data, which makes the image too uniformly bright and removes the highlight contrast I want to add in the next phase.
I leave it alone almost every time.
The video below shows how to fine tune the Base Tone Method with examples for Steps 8 and 9.
Step 10 — Creative Hand-Off
Your Base Tone is set. The RAW file is now a structurally clean digital negative — technically sound, tonally balanced, and holding deliberate gaps at both histogram extremes. Carry the file into Lightroom’s advanced panels or into Photoshop to execute your specific creative vision.
I prefer to use Photoshop, however I know the majority of people are Lightroom users, so here are some ideas for creative adjustments in Lightroom.
Color harmony: Use the HSL/Color Mixer or Color Grading panels to establish color relationships and mood without fighting pre-baked contrast.
Color separation: With the tonal structure anchored and the gaps preserved, use the HSL/Color Mixer’s Luminance and Saturation sliders — or the Point Color tool and its Variance slider — to separate colors that are tonally close but visually distinct. Autumn foliage, mixed greens, and sky gradients all benefit from this step. Because you haven’t pre-crushed the contrast or clipped the highlights, individual color channels still hold separation that aggressive early editing would have destroyed. This is also the stage to address any localized color casts — the blue in waterfall mist or the magenta in bright skies — that resisted the global white balance correction in Step 2.
Precision light shaping: Apply AI-assisted masking or luminosity brushes for localized dodging, burning, and zonal contrast. The tonal gaps you preserved exist specifically for this work. For a detailed look at how DxO PureRAW and Lightroom AI Denoise compare in protecting signal quality, the article linked here covers the SNR mechanics thoroughly.How DxO PureRAW and Lightroom AI Denoise Compare in Protecting Signal Quality. The article linked here covers the SNR mechanics thoroughly.
Creative finishing: Subtle vignettes, atmosphere effects like the Orton effect, and other stylistic touches belong here, at the end, after the structural decisions are locked.
Stop before the image loses its natural feel. Every enhancement at this stage should stay true to the experience of the original scene.
Get an email when new articles are published
The Gap Theory — What This Workflow Is Actually Doing
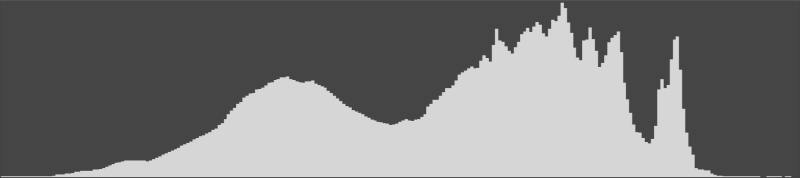
The central premise of the Base Tone Method is straightforward: before any creative editing begins, your histogram should have breathing room on both sides. There should be space between your shadow data and the left wall, and space between your brightest textured highlights and the right wall at 255. That breathing room — the tonal gap — is what gives you the latitude to place emphasis deliberately through dodge and burn, zonal contrast, and luminosity masking.
Some files arrive with that space already present. A correctly exposed scene on a high-dynamic-range sensor may show natural headspace on both ends of the histogram before you touch a single slider. In that case, the Provisional White Boundary needs little or no adjustment, and the Blacks lift in Step 3 may be minimal or unnecessary. The method does not require you to manufacture gaps artificially — it requires you to ensure they exist before creative work begins, however they get there.
This held true across every sensor size tested — from the Micro Four Thirds chip in the OM System OM-5 Mark II to the 45-megapixel full-frame sensor in the Nikon Z7II — confirming that the principle scales with scene luminance and histogram distribution, not with sensor size or quality.
The Creative Cost of an Early Decision
Setting your white and black points at the start of an edit makes the histogram look full, and the image look finished. What it actually does is remove the room you need to make intentional light later.
Dodging requires headspace above your current highlights. If the brightest tones in your image are already sitting at or near 255, your dodge brush has nowhere to go. You cannot make a cloud glow, brighten a sunlit ridge, or draw the eye to a reflection in still water — the data is already at its ceiling. The only direction available is down.
The same logic applies to burning and regional contrast. Deep shadow regions that have been pinned to pure black carry no recoverable texture. A spotlight effect — darkening the periphery to direct attention toward the subject — requires actual tonal separation in the darker regions of the frame. If those regions are already crushed, the burn produces only a flat, undifferentiated darkness rather than the dimensional shadow you were after.
The tonal gaps the Base Tone Method preserves are not a technical formality. They are the physical space inside which artistic decisions live. Every dodge, every burn, every act of regional contrast shaping depends on there being room to move in both directions.
Create that room at the start, deliberately, and your finishing tools work with the image. Collapse it early, and you spend the rest of the edit working around a constraint you imposed on yourself before the creative work even began.
The SNR Debt
Global exposure reduction scales every pixel equally and brings the noise floor closer to the signal. The Base Tone Method avoids this by using the Highlights slider — an image-adaptive tool that targets bright signal specifically — and the Point Curve ceiling as a structural boundary, not a global dimmer.
The 240 Ceiling
The Point Curve ceiling — Output set in the range that works for your file and sensor — acts as a structural gate. Every pixel stays below 255. Textured highlights stay alive. The gap that the ceiling creates is where the glow in your final image lives.
The Artist’s Leeway
That buffer between your ceiling and the clipping wall is not empty space. It is the room your dodge brush needs to make a cloud radiate. It is the latitude that separates a technically correct edit from one that looks like real light.
A Word on Comparative Evidence
The Base Tone Method is built on logical principles — scene-referred editing, SNR preservation, structural gap creation — that are well-documented in RAW processing literature. Whether it produces better outcomes than your current workflow is not something I can answer for you.
Based on my own testing across five camera systems and more than 100 files, I believe it does.
But the honest recommendation is this: try it on your own files, in your own scenes, with your own downstream tools, and let the results make the case. Personal preference and shooting style are variables no workflow document can account for. What this method gives you is a structured starting point and a clear philosophy. What you do with it is yours to decide.
The gap either exists or it needs to be created. The hardware determines how much work that takes — not whether the work is necessary.
FAQ
What is the Gap Theory in photography?
The Gap Theory is the practice of intentionally preserving buffer zones at both extremes of your histogram before touching any creative slider. Those gaps give you the latitude to place your image’s brightest and darkest points deliberately — through dodging, burning, and targeted contrast — rather than accepting where a slider algorithm puts them.
Why not just lower the Exposure slider to protect highlights?
The Exposure slider scales every pixel in the image equally and brings your midtones and shadows closer to the noise floor. The Provisional White Boundary uses the Point Curve to protect highlights structurally, without touching the midtones or incurring SNR Debt.
Does this workflow work without DxO PureRAW?
Yes. DxO PureRAW improves the quality of the data you start with, but it is not required. Adobe’s AI Denoise in Lightroom handles Step 0 if you prefer to stay within a single application. The Base Tone steps are identical either way.
What is the Provisional White Boundary?
A Point Curve adjustment that sets a structural ceiling for the file by moving the white point node downward, preserving a gap between your brightest textured highlights and the 255 clipping wall. The specific Output value varies by scene luminance, sensor, and personal preference. That gap is reserved for highlight contrast work and targeted dodging later in the edit.
How does the Base Tone Method differ from David Kingham’s Rethink Landscape Tool?
Kingham’s tool uses larger slider movements and approximately 20 different profile presets based on the original histogram shape. The Base Tone Method uses smaller movements, a single workflow structure, and adds the Provisional White Boundary as a structural step that Kingham’s approach does not include.
References
- Scientific Imaging, Inc. “Signal and Noise.” scientificimaging.com. https://scientificimaging.com/knowledge-base/signal-and-noise/ (2026)
- Adobe Systems. “Tone Control and Tonal Adjustment in Lightroom Classic.” helpx.adobe.com. https://helpx.adobe.com/lightroom-classic/help/tone-control-adjustment.html (2023)
- Cambridge in Colour. “Understanding Gamma Correction.” cambridgeincolour.com. https://www.cambridgeincolour.com/tutorials/gamma-correction.htm (2024)
- Kuyper, T. (2024). The Power of Linear Profiles in RAW Conversion. GoodLight.
- Marsh, T. (2024). How Lightroom, ACR, and Photoshop Work With Image Data. toddmarsh.com
- DxO Labs. (2025). DeepPRIME 3 and RAW Pre-Processing. dxo.com
- Evening, M. (2015). The Adobe Photoshop Lightroom Book. Peachpit Press.
- Benz, G. (2025). HDR Display Technology and Highlight Headroom. Greg Benz Photography.
