
Transcript of the Variance Slider Video
Alright, I want to show you a new function in Camera Raw.
It just came out this week. I think it will get into Lightroom eventually.
I think it’s pretty cool. Let’s get right into it.
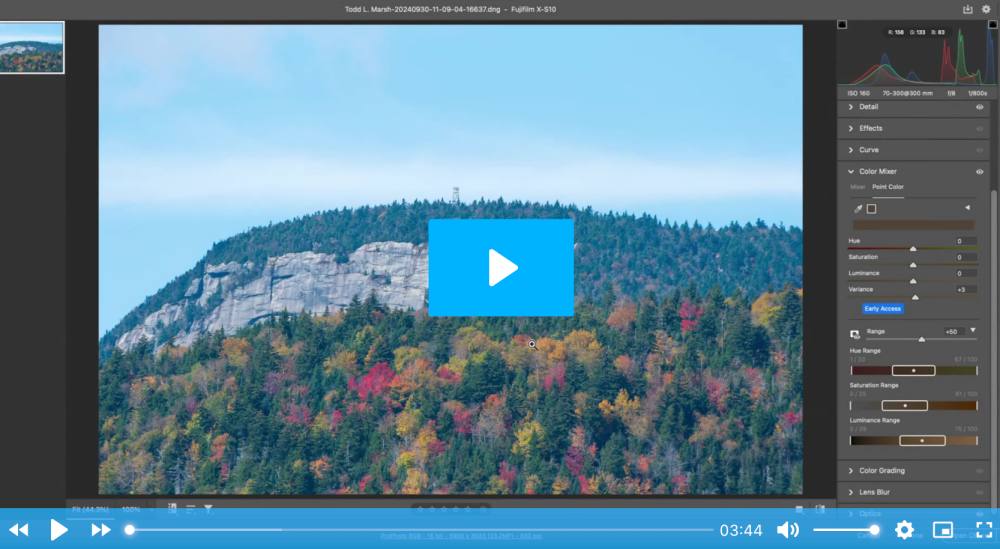
Here we have a picture of Snowy Mountain with the fire tower on top.
This image was completely underexposed. I’ll probably have to do, if I want to keep this photo, I’ll probably have to dual process that one for the sky, one for the foliage.
What I really want to show you is what we can do to the foliage.
I’ve made some general corrections here like I said it was way under exposed but what I want to show you is down here in the color mixer and the point color it’s a new function it’s called the variance slider.
Here you can see it says early access so what what do we want to do well maybe we want to do it works really good on portraits but it really will work good on some landscapes too.
If we want to do some color separation here so if we click this point color this little eyedropper, we can pick a color.
What I want to do is separate some of these oranges and yellows and greens. So you can see I clicked this color right here, this brown color. And first thing we want to do is we can change, we used to have to change these so we can move these dials or these sliders and these adjustments here to change the color a particular color, whatever one is sampled.
But there’s a new tool which is going to make that easier and this is called Variance.
So we’ve picked this mute orange yellow color right here and what I want to do is I want to separate the colors. I want to make the colors more distinct. So we can take this variance slider and we can bring this up and you can see the yellows and oranges separating.
Especially if look right here between this one and this tree here, this area right here. If I bring this variance up, you can see them separating. You can see this tree getting more yellow and this tree getting more orange. And I can shut the eye dropper off here. And you should be able to see the difference.
Hope it shows up on the video. It’s showing up on my screen. If you want them more of the same, you can also bring it this way, negative. You can see everything looks more of the same color. Or in this way, we’re separating colors. So that’s a real good way to separate them.
And then we can go on here with luminance if we want to and change those colors. So if we want to highlight those yellows and oranges, we can just move this luminance up a little bit, saturate them, desaturate them.
This is a real good way to do color separation.
You can even change the hue if we want. If we want to make this a little bit more yellow, we move it this way, towards green, or this way towards red. I generally leave the hue alone, and I just mess with this variance now.
You can see it makes a little bit of separation. And the nice thing about this, this is in Camera Raw. If we don’t want that variance to happen anywhere in the screen, we can bring it into Photoshop, it paint it out and then we don’t have to worry about it anywhere else.
I hope you get something out of this and it works for you. I’ve seen examples of this works really good with portraits so if a person has some rosy cheeks or a red nose or something like that in a portrait they can click on a normal part of the skin and make this negative and it brings those red tones down.
Where in landscape we generally want to go the other way and do more color separation.
This would also work really well in greens, so maybe another time I’ll do another example. But again, you can see the difference here with just this color mixer. It’s a little bit more muted here, and now they’re a little bit more separated.
Give this a try, especially if have some greens or yellows.