

Quick Answer: Linear RAW profiles remove software interpretation from your sensor data, giving you direct access to the light your camera actually captured. Standard profiles compress highlights and crush shadows before you even start editing. Linear profiles preserve all the information, letting you make every tonal decision yourself.
The Hidden Software Layer Between Your Sensor and Your Edit
Your camera captures light as pure measurement data. But before you touch a single slider, your editing software has already made dozens of aesthetic decisions for you.
Standard profiles in Lightroom and Camera Raw apply contrast curves, saturation boosts, and color shifts to make your RAW files look immediately pleasing. This “beautiful lie” discards up to two stops of usable highlight data and compresses shadow detail before you begin editing.
Linear RAW profiles—called “Step Zero” by photographers like Tony Kuyper and Greg Benz—strip away this interpretation layer. You get the actual numbers your sensor recorded, with zero manipulation.
Linear Profiles are camera-specific. Each camera model adds its own profile to the RAW data. Therefore, you will need a linear profile for each camera model you own.
Don’t worry, they are free, and you can download them at Tony Kuyper’s website. He also has instructions on how to add them to Lightroom and other RAW processors. It is easy!


Here is an image that is un-edited, except that the first uses the Adobe Color Profile. The second image (move the bar back and forth) is the same image, only using the Linear Profile for my camera.
Yes, the linear profile is darker and less colorful, but you can see how much highlight and shadow data is recovered in the Linear Profile without using any sliders.
This allows you to make more decisions with the image.
What Makes a RAW Profile “Linear”
A linear profile uses an identity rendering—it displays sensor data exactly as captured. The relationship between light and digital value stays perfectly proportional.
Standard profiles apply a power-law transformation (roughly Input^0.45 = Output). This “bows” the data upward to match human perception. It makes images look punchier but compresses highlights and amplifies shadow noise.
Linear profiles use Input = Output. No curve. No interpretation. If you double the photons hitting your sensor, the digital value doubles exactly.
I have published a more in-depth article on power law transformations of our images in Why the Camera Measures Light Differently Than You See It.
Understanding Input-Referred vs Output-Referred Data
There are two ways to represent image information, and understanding the difference is critical.
Input-referred data represents the physical scene. It measures light intensities exactly as they hit the sensor. If one light source is twice as bright as another, the digital values are exactly double. This is what a linear profile preserves.
Output-referred data is optimized for display devices. Standard profiles transform linear sensor data into perceptual space by applying gamma curves and tone mapping. At this stage, digital values are display instructions, not photon counts.
Staying in input-referred space during initial edits means your sliders act as physical light modifiers rather than aesthetic filters.
For more information, see my article on how Lightroom processes RAW Data.
Why Linear Files Look Dark and Flat
Apply a linear profile, and your image appears notably flat, dark, and desaturated. This isn’t a problem—it’s proof of data integrity.
Your camera sensor counts photons through the photoelectric effect. It’s strictly linear—a counting machine governed by semiconductor physics.
Your eye works logarithmically (Weber-Fechner Law). You’re far more sensitive to relative changes in shadows than highlights. A candle doubling to two candles looks similar to 100 candles doubling to 200.
“By going linear, you remove the gamma translation and see the raw math of the sensor before it’s been adjusted for human eyes.”
Standard profiles bridge this gap automatically. Linear profiles make you do it manually. The flatness means you’re seeing unprocessed reality.
The Hidden Cost of Standard Profiles
Standard profiles like Adobe Color and Camera Standard provide instant gratification but create three technical problems.
Clipped highlights: Aggressive S-curves compress the brightest tones to create visual punch. This discards up to two stops of recoverable highlight data that your sensor actually captured.
Crushed shadows: Shadow contrast boosts pin dark values against the left edge of your histogram. Fine detail becomes difficult to recover without introducing artifacts or noise.
Proprietary color shifts: Standard profiles apply saturation-dependent hue twists. The same color shifts as brightness changes. This makes objective color grading nearly impossible because the ground truth keeps moving.
How Sensor Data Is Actually Distributed
To understand why linear profiles look dark, examine how a 14-bit RAW file distributes its 16,384 tonal levels across exposure.
Because sensors are linear, they follow a doubling rule. Each stop of additional light doubles both the photons captured and the digital levels used to describe that stop.
This creates a lopsided distribution. The brightest stop uses half of your entire file’s data.
| Exposure Stop | Description | Linear Levels | % of File |
|---|---|---|---|
| Stop 1 | Brightest Highlights | 8,192 | 50% |
| Stop 2 | Bright Highlights | 4,096 | 25% |
| Stop 3 | Mid-High Tones | 2,048 | 12.5% |
| Stop 4 | Midtones | 1,024 | 6.25% |
| Stop 5 | Mid-Shadows | 512 | 3.1% |
| Stop 6 | Deep Shadows | 256 | 1.5% |
Standard profiles stretch those 256 shadow levels so they appear bright enough for your eyes. Linear profiles leave them at the bottom. You’re seeing the physical reality that 94% of your file’s data describes only the top four stops of light.
This distribution explains why “expose to the right” works. Underexpose, and you force your entire image into the bottom stops, where only a few hundred levels describe the scene. Push those in editing, and you get noise and banding.

Working with Highlights
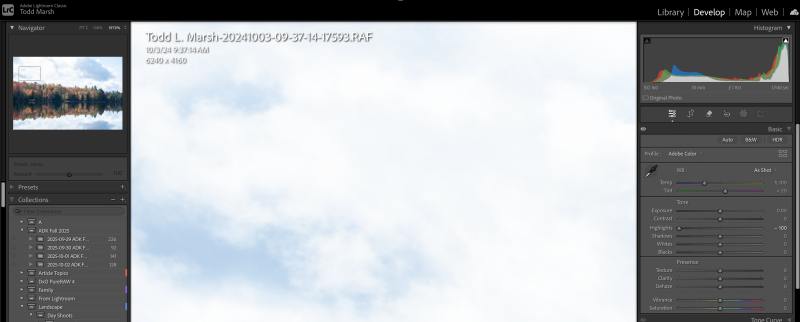

Here is an example of that. Here is an image showing clouds that have been zoomed into at 200%, and the highlight slider has been dragged down to -100.
In the first (left image), is Adobe Color Profile. You can see that when the highlights are lowered, the bright spots in the clouds are mostly blown out, and the darker spots look “muddy” with no texture or contrast.
The image on the right of the slider box is the same screen, except the profile has been changed to a Linear Profile. There is more contrast, better texture, and these attributes can now be modified further by dodging or burning. You now have more room to work on your edits.
Early Article on Linear Profiles with Video on How to Install Your Linear Profile for Your Camera
Click this link to see an earlier, less technical version and video on how to install an LP: Why Tony Kuypers Linear Profiles Are a Game-Changer for Serious Photographers.
The Step Zero Workflow
Successfully implementing linear editing requires a specific sequence. The order matters.
Step 1: Apply the Linear Profile
This is your foundation—Step Zero. The image will look flat and dark. That’s expected.
Step 2: Set White Balance
White balance must happen after applying the profile. The 3×3 color matrix needs to weight the RGB channels correctly based on your chosen profile’s interpretation.
“In a linear environment, an exposure adjustment of +1.00 is a mathematical doubling of light, providing significantly more room for adjustment without hitting mathematical resistance.”
Step 3: Push the Data Closer Together
Use some or all of the following sliders to compress the data. Using the histogram as a visual, we want room on the left and right of the histogram. Use some or all of the following sliders to push the darks to the right and the lights to the left.
Start with the blacks slider, then the highlights slider.
If needed, adjust the shadow slider to move the darks more toward the right.
Lastly, if needed, use the whites slider to move more data to the left. I use this as a last resort and infrequently.
Step 4: Adjust Exposure as Pure Gain
Use the Exposure slider as a global gain adjustment. Because the data is linear, this slider acts as a pure multiplier. It doesn’t distort tonal relationships—it scales everything proportionally.
Push the data left or right to place it more toward the middle of the histogram. Leave more room toward the side you want to draw out the data with the tone curve, or more importantly, using local adjustments to expand the tonal range of the image.
You are now the rendering engine, making intentional choices instead of accepting Adobe’s defaults. This takes more time than using a standard profile. But you control every tonal relationship in your image.
NOTE* I will publish a workflow on setting the Base Tone of an image soon! Fill in the information below, and I’ll send you an email when the workflow and video are published.
Technical Advantages of Linear Editing
Superior Highlight Recovery
Research by Walter Lysenko suggests Adobe’s engine incorporates a subtle “highlight shoulder” above extreme brightness values. It can extrapolate data from red and blue channels even when the green channel has clipped.
Linear profiles keep this data uncompressed. The reconstruction engine works with the highest possible precision. Standard profiles squash highlights before reconstruction happens, limiting what can be recovered.
The “Auto” Button Works Better
Adobe’s AI-driven Auto algorithm often performs better on linear data. Because highlights aren’t pre-compressed, the algorithm can more intelligently distribute tonal values across your histogram.
It produces a cleaner starting point than applying Auto to Adobe Color or Camera Standard.
Predictable Slider Behavior
Standard profiles apply resistance to slider movements because they’re fighting against pre-applied curves. Linear profiles respond proportionally to every adjustment.
You get significantly more latitude before hitting clipping or crushing values. The file feels more flexible.
Five Reasons to Switch to Linear
Linear workflow provides transformative benefits for photographers who want maximum control.
1. Predictive slider response: RAW sliders behave mathematically. An exposure adjustment of +1.00 is a pure doubling of light. No hidden curves create resistance or unexpected compression.
2. Extended dynamic range: Bypassing chopped highlights and crushed shadows reclaims up to two stops of usable information. You get a cleaner canvas for aggressive recovery work.
3. Stable color accuracy: Eliminating proprietary hue twists ensures colors remain consistent across the entire brightness range. A specific hue stays the same whether it’s in deep shadow or bright highlight.
4. Richer color palette: Linear profiles provide rich color without over-saturation. Because saturation isn’t pre-boosted by an S-curve, you have a wider range of subtle tones. This prevents the plastic look of high-contrast profiles.
5. Effective HSL adjustments: Hue, Saturation, and Luminance controls become far more powerful. Since color data hasn’t been compressed into display space, these sliders work on the raw chromatic signal, producing cleaner separations and more natural transitions.
The Counterarguments You Should Consider
Linear workflow offers technical advantages, but there are legitimate drawbacks.
The Myth of “Pure” RAW
Truly raw data rarely reaches your software. Hardware-level noise reduction and Adobe’s proprietary demosaicing mean Step Zero is still an interpretation—just a flatter one. You’re not editing pure sensor output. You’re editing Adobe’s version of it.
Perceptual Intent vs Technical Accuracy
Baked-in hue twists in standard profiles prevent unnatural color shifts near clipping. They’re engineering solutions to perceptual problems. Without them, technically accurate colors may appear perceptually jarring to viewers.
Workflow Efficiency Trade-Off
Manually rebuilding tone curves is time-consuming. For many professionals, the marginal gain in data integrity doesn’t justify the loss in editing speed. Standard profiles deliver 90% of the quality in 10% of the time.
Quantization and Banding Risks
Aggressively stretching a small number of linear shadow bits into visible range can cause posterization or banding. Gamma-corrected profiles mask this by distributing levels differently from the start.
Learn how gamma encoding works in photography.
The Print Test
There’s limited double-blind evidence that viewers can distinguish between a masterfully edited standard-profile image and a linear-profile image in a final high-quality print. If the result is identical, is the extra labor justified?
Who Should Use Linear Profiles
Linear workflow isn’t for everyone. It’s best suited for photographers who:
- Shoot high-dynamic-range scenes requiring extreme highlight and shadow recovery
- Need clinical color accuracy for commercial or product work
- Want maximum control over every tonal relationship
- Have time for a more deliberate editing process
- Use high-end cameras with excellent sensors (R5, Z8, A1, Z9)
If you’re shooting events, sports, or high-volume work where speed matters more than extracting the last 5% of quality, standard profiles are likely the better choice.
Treating Your Camera as a Measurement Device
The shift to Step Zero treats your camera as a measurement instrument rather than an aesthetic one. You’re working with scientific data instead of pre-processed imagery.
This requires a more intentional editing process. The reward is a file with maximum dynamic range and clinical color accuracy. Your final image becomes a realization of your vision, not a software engineer’s interpretation.
Linear profiles won’t make bad photos good. But for photographers who know exactly what they want and need maximum flexibility to get there, they provide unmatched control over the captured data.
References
Primary Technical Documentation
- Adobe Systems. (2023). Digital Negative (DNG) Specification (Version 1.7.1.0). Adobe DNG SDK
- Holm, J. (2020). Color Management for Digital Photographers. DCamProf Documentation
- Lysenko, W. (2021). The Adobe Highlight Reconstruction Engine: A Forensic Analysis of Channel Extrapolation. Technical Whitepaper.
- Poynton, C. (2012). Digital Video and HD: Algorithms and Interfaces. (Second Edition). Elsevier.
Linear Profile Repositories & Guides
- Kuyper, T. (2021). Linear Profile Repository. GoodLight.us
- Good Light Journal. The Linear Profile: A new beginning in Lightroom and Camera Raw. Tony Kuyper’s Journal
- The Classic Presets. How to Create Linear Camera Profiles and Why They Are Essential. Classic Mag
Technical Theory & Color Science
- Cambridge in Colour. Understanding Gamma Correction. Cambridge in Colour
- Cobalt Image. Our Technology: Matrices and DCP Science. Cobalt Image
- University of Chicago. Noise, Dynamic Range and Bit Depth in Digital SLRs. UChicago Physics
