
Most photographers will admit that Adobe Photoshop is a powerful tool. However, the interface is confusing and intimidating, and some advanced functions take many steps.
This is why many, if not most, photographers use Adobe Lightroom for the majority of editing.
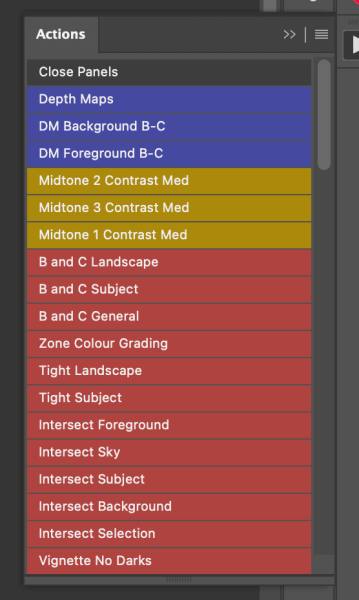
I believe, if they took the time to look at the TK9 plugin for Photoshop, built by Tony Kuyper, they would change their minds. The plugin adds a panel with many one-click actions (see below) that combines editing steps and still gives the photographer the freedom to modify the edit to their liking.
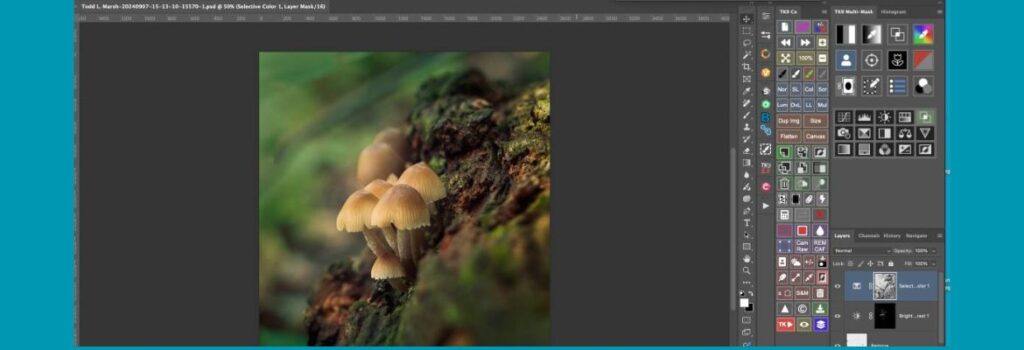
It was designed for making pixel-value masks and running in Photoshop. In short, TK9 automates complex selections and tasks, saving time and giving finer control than Photoshop or Lightroom alone.
The panels are designed to be a pixel-based editor to ideally be combined with masks (luminosity masks, color masks, zone masks, saturation masks, etc.) for exacting control over every pixel in the image through layers, masks, brushes, and selection tools.
I was once convinced by others that Photoshop is a destructive workflow. But that isn’t true, and most editing functions are non-destructive (via adjustment layers or smart objects), depending on how you build your workflow.
Let’s take a look at the reasons I believe Photoshop, when used with TK9 Actions, is the ultimate software for editing your RAW photos.
Not Sponsored or Affiliated with the TK9
I have no affiliation with TK or Tony Kuyper. I have bought the plugin with my money and don’t get a cent for saying good things or sending you to his website. It is a tool that I use every day, and I enjoy using it and love the results.
By the way, the plugin is one of the best values in photography. It costs less than $40.
What Are Photoshop Actions, and Why Is the TK9 Plugin Called TK Actions?
Photoshop actions are a way to automate steps in your editing process. An action is a list of recorded tasks—like adjusting contrast, applying a filter, or creating a mask—that Photoshop can replay with a single click.
Instead of repeating the same steps on each image, you run the action and Photoshop does it all for you.
For example:
You can create an action that turns a photo black and white, adds contrast, and sharpens the image. Once recorded, you can apply that same look instantly to other images, but still have use of the tools to make adjustments as you see fit to each image.
Why It’s Called “TK Actions”
TK stands for Tony Kuyper, the creator of the plugin.
He began by building downloadable Photoshop action sets for making luminosity masks—a way to target very specific tones in an image.
These early tools became known as TK Actions.
Over time, Tony turned those action sets into a full plugin panel, still nicknamed TK Actions.
The name stuck, even though the latest TK9 panel does much more than just actions—it builds masks, runs creative effects, exports images, and lets users build their own custom workflows.
So while TK Actions started as simple recorded sequences, the TK9 plugin has evolved into a full-grown control panel for serious photographers.
Many of the Reasons I Love and Use the TK9 Plugin
Here are the main reasons I love the plugin. I’m not saying Lightroom isn’t getting better, but there is so much more that Photoshop can do that Lightroom can’t, and with the actions in the TK9 Plugin and even more so with the custom actions you can build and implement with the push of one button.
Precise Pixel-Level Masks
- 16-bit masks for smooth edits. TK9 creates pixel-based masks for lights, darks, midtones, color, saturation, edges, or focus. These masks use 16-bit depth, so tonal blends are smooth and natural.
- Many mask types. TK9 goes beyond Photoshop’s built-in tools. It can make masks based on luminosity, color channels, hue or saturation, vibrance, blend-if settings, and even user-created channels and masks. It also offers edge-based masks (half-edge) and focus/depth masks that Lightroom will never be able to create.
- Flawless blending. Because TK9 masks are pixel-perfect and self-feathering, edits blend without harsh halos. Luminosity masks from TK tools create better quality masks than standard methods, and the masks can be easily edited and reused.
One-Click Editing Tools
- Combo/Cx panels. TK9 includes custom panels (Combo and Cx) with buttons for common tasks. For example, add a dodge or burn layer, apply a blend mode, or run a filter with one click instead of hunting menus.
- Creative actions. TK9 adds menus of special effects (vignettes, dehaze, color tints, etc.) that run instantly. You no longer need to set up layers or remember shortcuts for these common effects.
- Web sharpening and watermarking. The Export module can batch-resize, sharpen, and watermark images in one step. With a single click, you can prep photos for social/web use – Lightroom’s export does similar tasks, but TK9’s interface puts all options in one panel.
- Save time on routine edits. Common tasks that take multiple clicks in vanilla Photoshop become a single button press with TK9. TK9 panels are a great time saver and make it so much easier for me to remember multi-step processing edits.
Custom Actions and Automation
- User-defined actions. TK9 lets you build custom lists of Photoshop actions in its My Actions panel. You can drag/drop your favorite actions into TK9, group them by color, and access them instantly.
- Record panel clicks. From TK9 v3 onward, you can record most button clicks as Photoshop actions. This means any multi-step process you do in the panel can be saved and replayed on other images.
- Programmable buttons. Fourteen of TK9’s buttons can be reprogrammed with your own actions. If you have a custom process, assign it to a panel button and skip having to look forever in the menus for the prompt.
Specialized Tools Photoshop Lacks
As I have mentioned, Photoshop has many features that Lightroom doesn’t have and even if you use Photoshop, creating the masks is time-consuming and takes a lot of brain power to remember. But with TK9, the masks solve many of the hardest editing conundrums by pushing one or two buttons.
- Edge-based masks. Half-edge masks let you select just the light or dark side of an edge, useful for avoiding halos when blending.
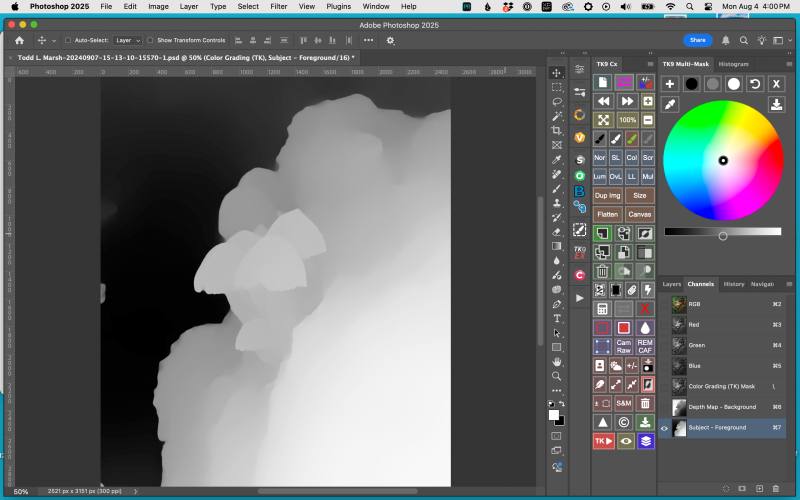
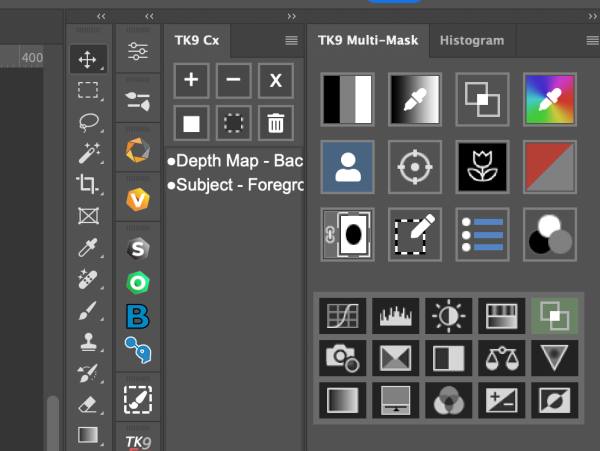
- Depth and focus masks. TK9 can generate a depth map to pick the foreground or background. This makes it easy to add background blur or do focus stacking. Lightroom and Camera Raw have no tool for using focus/depth data in masks.
Depth maps I use on about every image I edit. Can’t make them in Lightroom, and it is a pain in the ass to create them in Photoshop.
But with TK9, push one button and you have not one but two depth maps. One that you can focus your edits on the background, and the other on the foreground. - Zone and Color grading. TK9 offers one-click zone masks (all tonal zones or “Blend If” ranges) and a color-wheel interface for Curves grading. You can instantly adjust shadows through highlights or tweak the color cast with visual tools.
- HDR (32-bit) support. TK9 can work on 32-bit HDR RAW images in Photoshop. This means you can make masks even on high dynamic range files; Lightroom can only work on 32-bit TIFF images, assuming you have an HDR monitor.
The TK9 Calculator: A Smart Tool for Perfect Blends
Besides the Depth-map feature – I friggin love depth maps – the TK9 Calculator is the second most useful tool in the plugin. It helps you combine masks with total control—without guessing or redoing steps.
What It Does
The Calculator lets you add, subtract, or intersect two masks to create a new one. You can blend any two selections based on:
- Luminosity
- Color
- Saturation
- Edge detail
- Focus
- Zone masks
- Blend If ranges
This means you can build complex, ultra-targeted selections that fit exactly what you want to adjust.
Why It Matters
Without the Calculator, combining masks in Photoshop takes many steps: loading channels, applying levels, duplicating masks, inverting them, and more. One mistake and you have to start over.
With TK9’s calculator, you can select two (or 12) masks and choose how to combine them (add, subtract, intersect, etc.) together then output the result as a new selection, layer mask, or channel.
Yes, you can do this in Lightroom too by adding, subtracting, or intersecting masks. So what makes this more handy?
Most of the masks are already generated. You don’t have to adjust every single mask to get it the way you want before you intersect, add, or subtract it from the first. Masks that you have previously made or, even better, preconceived and created before editing, can be saved as channels and used by the calculator.
What Makes It a Game Changer
It might not seem much different from what you can do in Lightroom, but in practice, it is much more intuitive and quicker than Lightroom. The calculator gives you full control over targeted adjustments and makes advanced blends easy, repeatable, and more visual than cognitive.
The TK9 Calculator is one of the plugin’s most powerful tools.
Better Workflow than Lightroom
Here are the reasons I believe the workflow in Photoshop using the TK9 Plugin is easier than Lightroom.
- Pixel-level control. Lightroom and Lightroom Classic use parametric masks; TK9 works on actual pixels at 16-bit depth. This gives much finer control with TK9; you edit exactly the pixels you want.
- Layer-based editing. Photoshop layers can be merged, masked, and blended freely. TK9 uses layers and masks to blend edits, dodge & burn, or composite photos. Lightroom lacks true layers, so tasks like manual exposure blending, depth maps, or stacking images are only doable in Photoshop.
Yes, the TK9 plugin has an align and stack function that modifies the standard Photoshop align and stack function, making it more accurate than the program itself. - Pro workflow. The TK9 workflow is more efficient and creative than Lightroom alone. It automates complex steps so you can focus on the art instead of clicking menus.
Who Will Benefit
Serious outdoor and nature photographers often blend exposures, dodge/burn, and make subtle color fixes.
TK9 is built for that.
If you need fine-tuned local control or if you batch-export many images, TK9 speeds things up. It is especially useful for anyone who already uses Photoshop for fine edits but wants to do them faster.
For example, you can create a darks mask with one click, dodge an area with another, and resize and sharpen images for the web without leaving the panel. These tasks in standard Photoshop or Lightroom would be many clicks or separate steps.
My Thoughts
The TK9 plugin v3 is a powerful add-on for Photoshop users. By offering pixel-precise masks and one-click actions, it adds capabilities that Photoshop and Lightroom lack.
It automates complex edits, from tone masking to web sharpening, making your workflow faster and more consistent.
If you want to spend less time on clicks and more time on creativity, the TK9 plugin is worth exploring.
I understand people wanting to stay in one program and do their edits. It’s easier. But I think you will get better results using the advanced features in Photoshop just as quickly and easily if you give it a chance.
I will be posting videos on many of the functions of the TK9 Actions Plugin. You will see the power and quickness of this plugin.
If you want to learn more about the TK9 Plugin for Photoshop, you can visit Tony Kuypers’ website and read more about it. I believe it is the best $40 I have spent in photography. Again, I have no affiliation with the product or Tony.
Leave me you thoughts on using the plugin and what you use to edit your photographs below!

